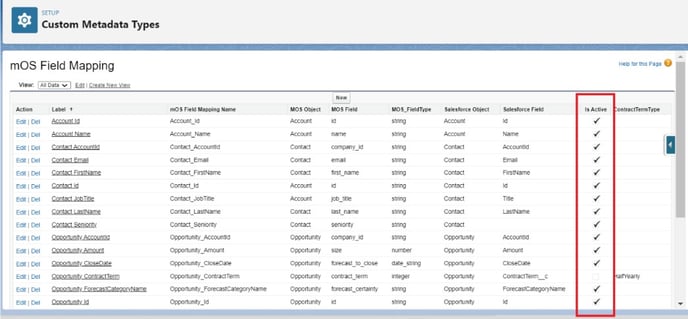
By default, the “mOS field mapping” custom metadata object in Salesforce holds all the mappings between Salesforce and mOS. All standard fields are already mapped with mOS fields. There are also additional fields that can be mapped, such as:
- ARR (Annual Recurring Revenue)
- Contract Terms
- Total Contract Value
- One off Cost
If those fields are available in our Salesforce instance, then they can be mapped manually by following the below steps.
- Login into your Salesforce account, click on the gear icon. Select Setup and start typing "Custom Metadata Types" in the Quick Find Box.

- Once this is done, select Manage Records for the mOS Field Mapping.

- View the list of all fields that are mapped to the mOS platform.

Note: Only the fields that are marked as Is Active are being synced to mOS.
If the Active field is not enabled (Is Active field is unchecked), then no synchronization will take place for that particular field from Salesforce to the mOS application.
How to change a field mapping so a different Salesforce field is being sent to mOS?
To edit a field, simply select Edit on the left-hand side of the relevant field.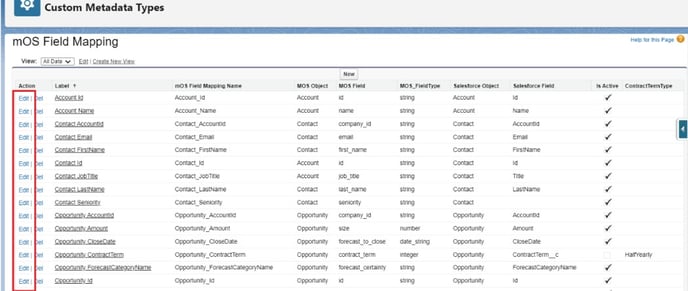
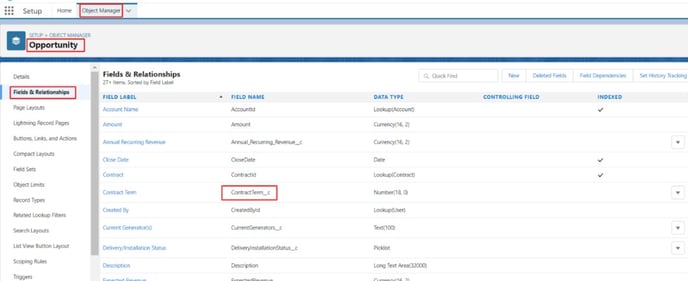
Let’s say we want to map the ContractTermType field, then
- Go to Object Manager
- Go to Opportunity
- Click Fields and Relationship
- Select the API name (Field Name) as shown in the screenshot below
Now, go back to the previous screen and click Edit against the Opportunity ContractTerm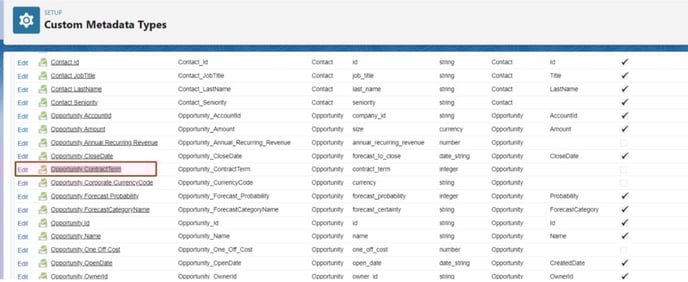
Update the API name and update against the “Salesforce Field”. Also, configure the ContractTermType.
By default, the ContractTermType is set to “Monthly”. But you can choose Quarterly, Half Yearly or Yearly depending on the business (this is only applicable to the contract term and need not be configured for other custom fields)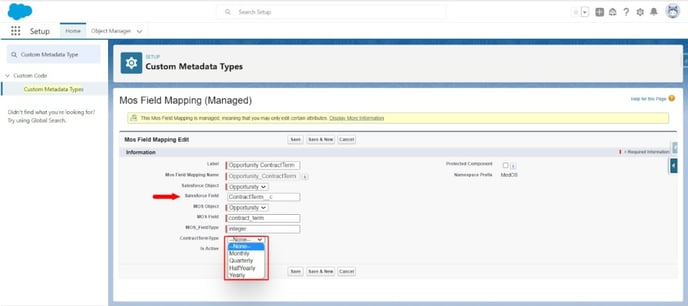
⬅️ Previous Step Next Step ➡️