Invite users to mOS and ensure they have the right access to get started.
To start inviting team members on mOS, the admin can select the + Invite or Import CSV options on-screen, at the top right-hand side of the My Organization screen.
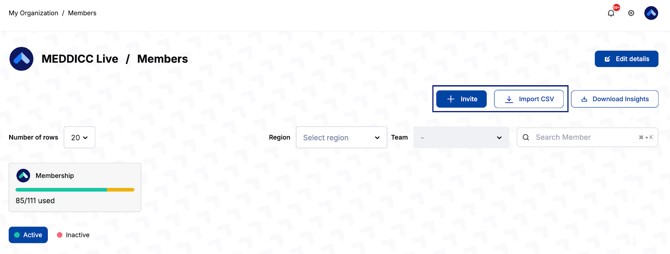
+ Invite button
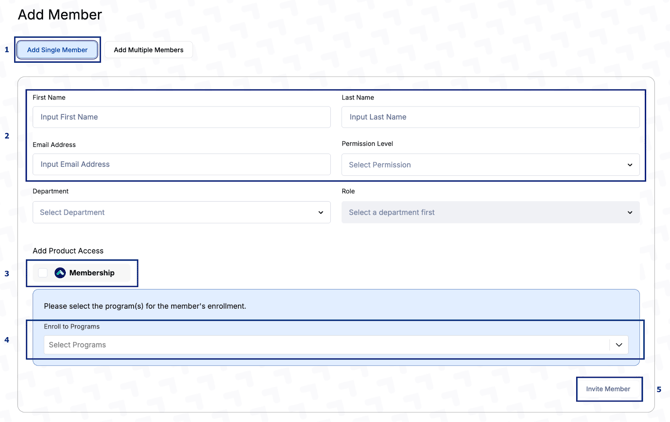
This option is ideal when inviting a handful of team members. Choose between Add Single Member or Add Multiple Members at the top of the screen, depending on your needs.
Option 1: To Add Single Member, select this option at the top-left of the screen, then simply fill out their First Name, Last Name, Email Address, Permissions, Product Access, and select Program(s). Once complete, click Invite Member to send the invitation.
Note: After the invite is sent, you won’t be able to assign or update programs for the member until they complete their account setup.
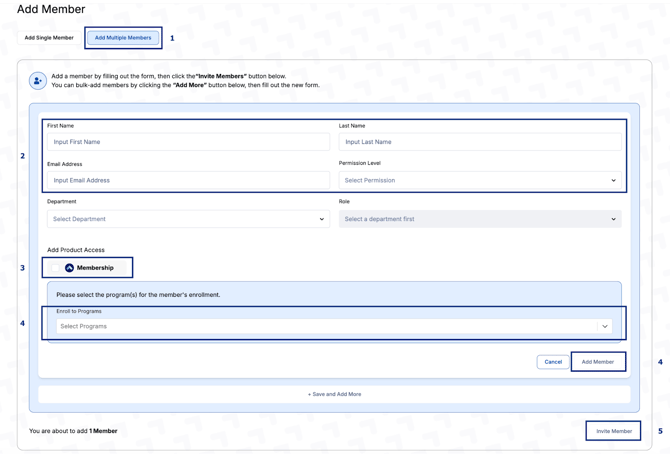
Option 2: To Add Multiple Members, select this option at the top left part of the screen and fill out the same fields: First Name, Last Name, Email Address, Permissions, Product Access, and select Program(s), then click Add Member to load a new form. Once you’ve added all members, click Invite Member to send the invitations.
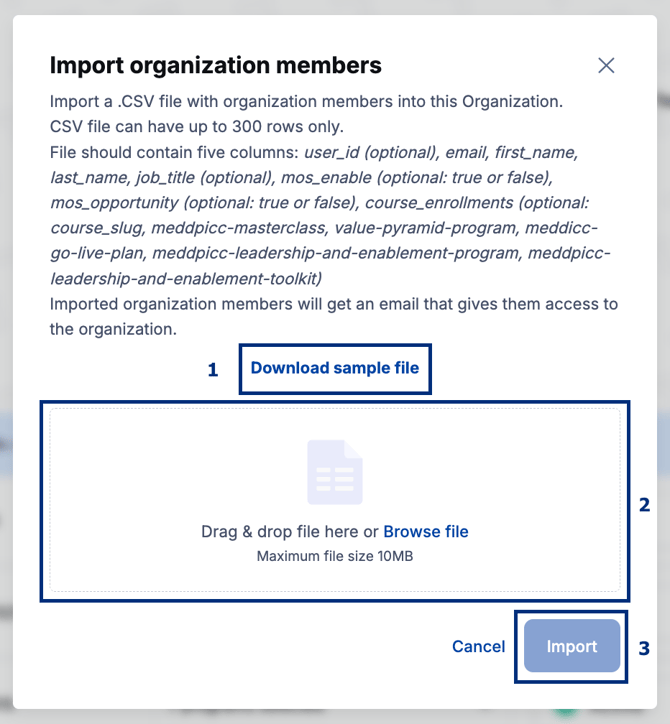
↓Import CSV
This option is perfect for inviting a large number of team members.
Click on Download sample file to access the CSV import template. After that, simply add all users to the spreadsheet and drop it into the on-screen box. Hit Import to process the file.
Here’s what the sample CSV import template looks like:
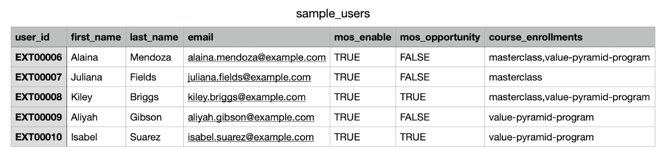
How to Fill Out the Bulk User Import Template
This CSV template allows you to invite multiple team members at once. Please follow the guidelines below when filling out the fields:
Required Fields & Instructions
- user_id
Start from EXT00001 and increment for each user (e.g., EXT00002, EXT00003, etc.).
- first_name / last_name
Input the user's first and last name accurately.
- email
Provide the user’s work email address. This is where their login instructions will be sent.
- job_title
Include the user's current job title (e.g., Engineer II, Legal Assistant).
- mos_enable
Enter TRUE if the user should have access to the mOS Enable seat. Otherwise, enter FALSE.
- mos_opportunity
Enter TRUE if the user should have access to the mOS Opportunity seat.
If your team does not have Opportunity licenses, please enter FALSE.
- course_enrollments
Enter the course slug(s) for the user’s enrolled course(s), separated by commas (no spaces).
Please make sure you use the correct slugs below:
|
Program Name |
Slug |
|
MEDDPICC Leadership and Enablement Toolkit |
meddpicc-leadership-and-enablement-toolkit |
|
MEDDPICC Leadership and Enablement Program |
meddpicc-leadership-and-enablement-program |
|
MEDDICC Value Program |
meddicc-value-program |
|
MEDDPICC Masterclass |
meddpicc-masterclass |
|
MEDDICC Go Live Plan |
Meddicc-go-live-plan |
|
MEDDICC Value Pyramid Program |
value-pyramid-program |
 |
|
 |
 |